Quick Guide To Your First Cue
Starting ONYX
Switch on the power to the console or start

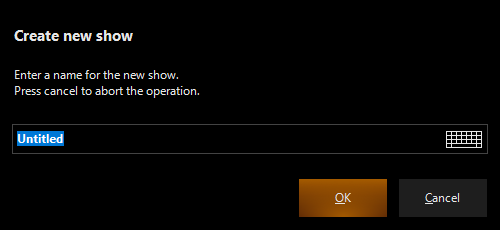
Starting a new show.
In the Launch Menu, choose the option, and click if prompted then proceed to name your show.
ONYX will now launch a new show with the default settings.
Adding Fixtures.
To choose the fixtures you want in the show, and patch them accordingly, you need to enter the patch.
To do this, press the ONYX quick menu button in the top left hand corner of the main screen.
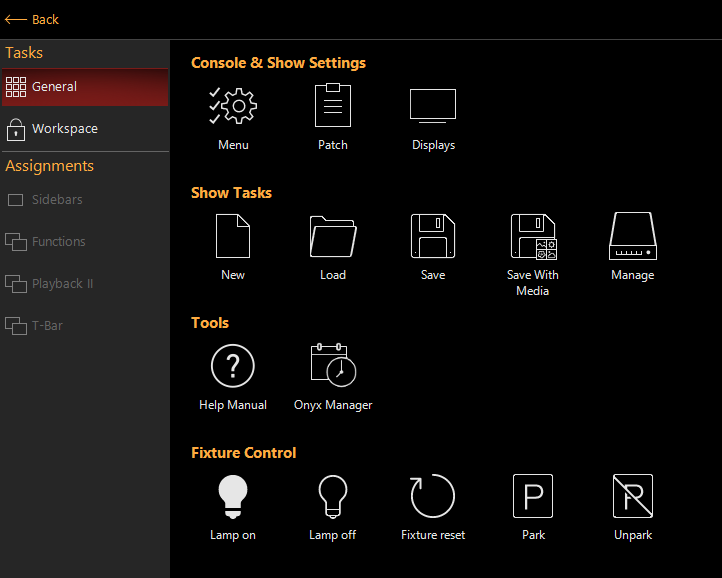
Press the button and
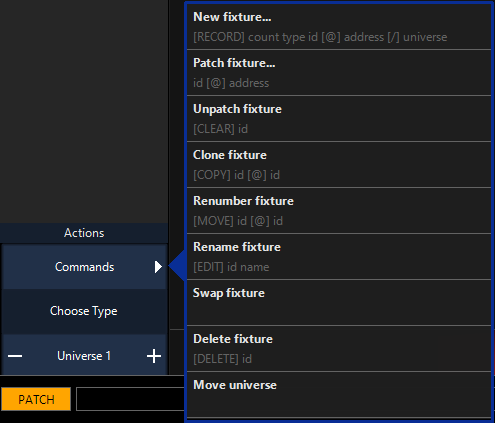
The easiest way to add new fixtures to the show is with the Auto Patch tool. So, press the Button, then the option.
Now you are in the Fixture Library. The library is arranged with manufacturers in the left most column, the fixture type in the second column, the mode in the third column and the DMX protocol readout in the last column.
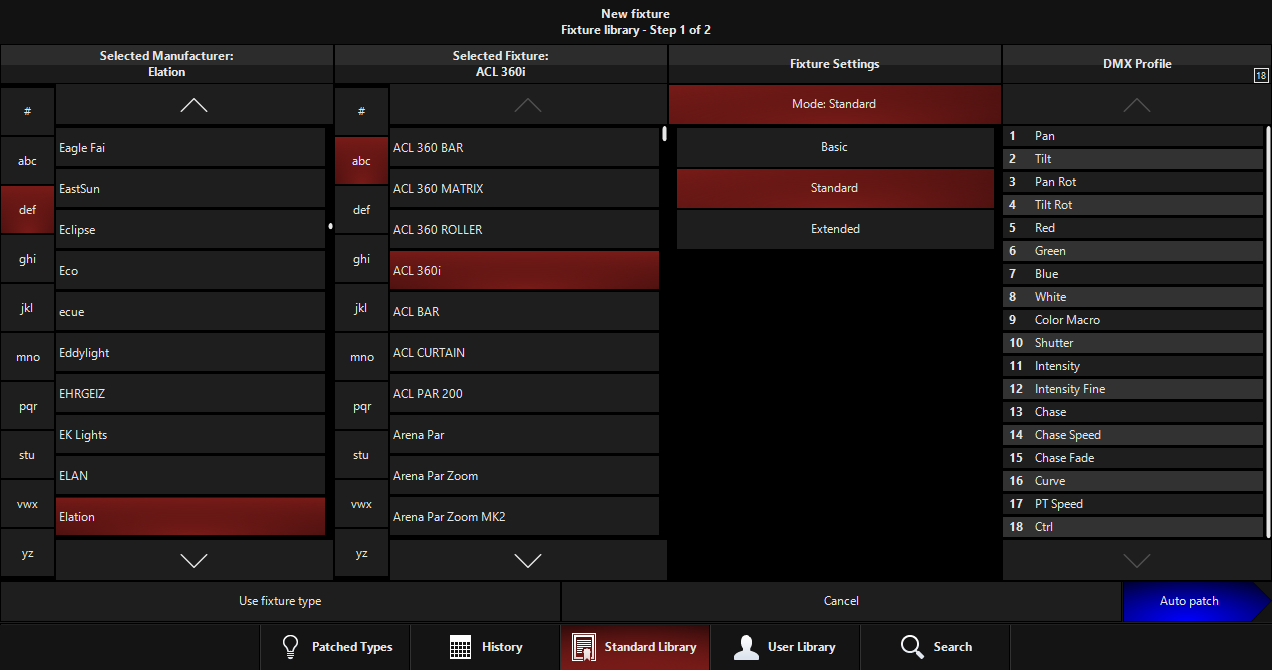
Navigate to the required manufacturer, fixture and mode by pressing on the available options. You can use the groups of letters to the left of each column to jump through the listings quickly.
Once you have found your fixture and selected the correct mode for your needs, press the blue button in the bottom right hand corner of the window.
Once in the Auto Patch window, simply set the counter to be the total number of the selected fixture you wish to patch.
The Start ID can remain at its default, or be changed to your preference by pressing the "Auto On" button and using the buttons. The start ID is the unique "fixture number" assigned to each fixture that you will use to call them up on the keypad.
You can also press on the value and use the number pad on your computer or console. Double-pressing will popup the on-screen number pad.
The Universe and Address can be changed in the same manner. If you leave them to "auto", the console will choose the first available address.
Press to add the new fixtures to the patch.
Once
Now press the amber button in the upper left hand corner.
If you're in the Compose Workspace (and you are if you have been following this page from the top), press , which is on the sidebar near the middle (position 4). In the window that pops out, press the tab and the press to select the fixtures you've just patched. A selected fixture button shows as green, except for the last selected fixture which will be red.
Assigning Parameter Values to the fixtures.
With the fixtures already selected, you can assign an intensity value by pressing @ 50 ENTER to assign a value of 50%.
Now assign other parameters:
Access the parameter belts by pressing the white arrow in the bottom right corner of the screen, then the parameter control groups & their belts will popup.
On the left side of the popup, you'll see the parameter control groups which apply to the fixtures you have selected. Because not all fixtures have Pan/Tilt attributes, you won't always see that parameter group.
Take a look through all of your fixtures parameters by clicking on the different parameter groups.
Then, move the belts/encoders to manipulate the values. To see which values have been changed, take a look in the Programmer window. You can also see when a parameter is active by looking at the bottom of the parameter belt - if the background is red, the parameter has been activated.
To assign values to individual fixtures, rather than the whole selection, simply press once to deselect the fixtures, then select an individual fixture, either in the fixture center or by typing its fixture ID on the keypad and pressing .
Recording a Cue.
Once you have assigned some values to the fixtures, you'll want to record this as a Cue to be played back later.
Press then press one of the buttons associated with the playback you want the Cue to be on.
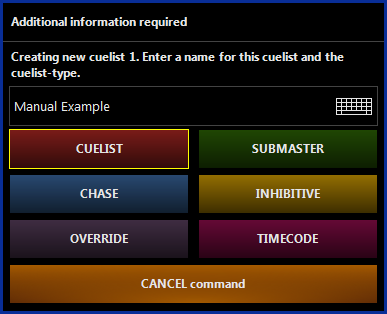
A popup will appear asking which type of Cuelist you would like to record and prompt you to give a name too. Fill in the name field using the onscreen keyboard, then press the red "Cuelist" button to finish recording the Cue.
Now the Cue will be part of the Cuelist you just recorded.
Press the button twice to clear the values from the programmer. (The stage will go dark here).
To Record more Cues, simply select fixtures and manipulate values in the same way, then press , and press the select key of the Playback where the Cuelist is located, or choose a new playback to create a new Cuelist.
Playing Back the Cue.
Push the fader up of the Playback where you assigned the Cuelist. Now press the play button at the top of the Playback (it has a number on it, indicating which playback it is). This is the default GO button and will run the Cue you recorded.
If you are recording to a Sub Playback fader, the button under the playback will serve as the GO by default. You may configure this in Cuelist Options.