Fixture Library Editor
The Fixture Library Editor is installed as part of ONYX for offline use or can be accessed on the console via the menu.
While it is best to have Obsidian Control create fixtures for you (and thus make them available to everyone), you can also create and modify your own fixtures if you have the need. Request and check for existing fixture profiles here.
Accessing the Fixture Library Editor on the console
- Access the Menu by pressing the hard key, or by pressing in the upper left hand corner and then press .
- Navigate to , under "Show".
- Launch the Fixture Library Editor from the options.

Creating a new Fixture
- Select the option from the startup screen.
- On the first page of the builder are some options to fill in - name, manufacturer, model, mode, category, maximum pan/tilt angles, and dimensions. Once these have been filled in, press in the bottom right of the screen.

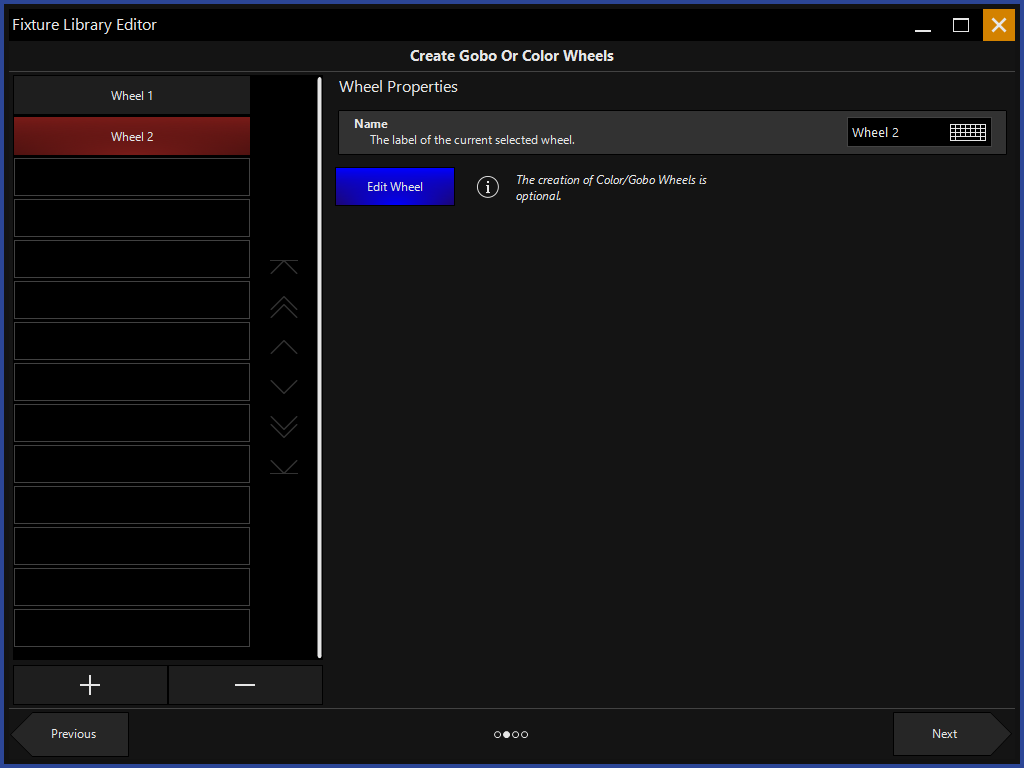
- The next page allows users to create the color/gobo wheels used in the fixture. Use the & in the bottom left corner of the screen to add the desired amount of wheels. Select the first wheel by clicking on it and press the blue .
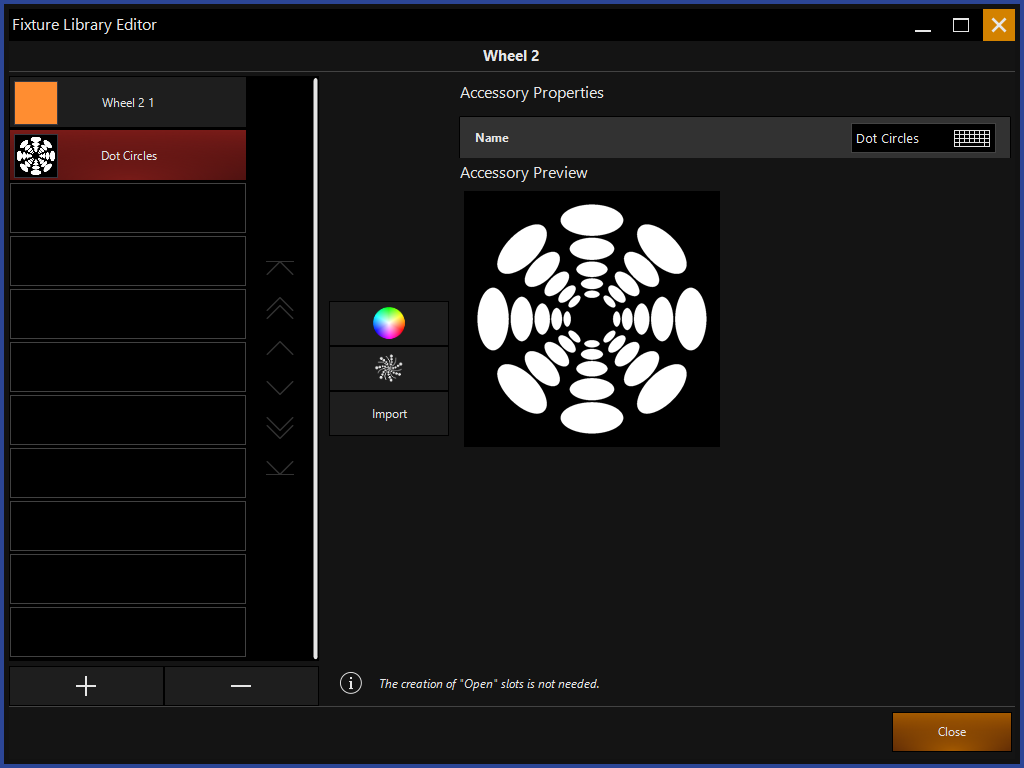
- Once in the "Edit Wheel" window, again use the & buttons in the bottom left corner of the screen to add slots to the wheel. In this case, it is a color wheel. Note that it is not needed to add an "Open" slot. In this window, you may rename the slots, choose a color from the color picker for each slot icon, choose a color or gobo image from a predefined library or import your own images for the slot.
-
Once you have completed the first wheel, press which will return you to the "Create Color/Gobo Wheels" Window. Repeat the process until all of the wheels are made.
-
Once all wheels are completed, press .

-
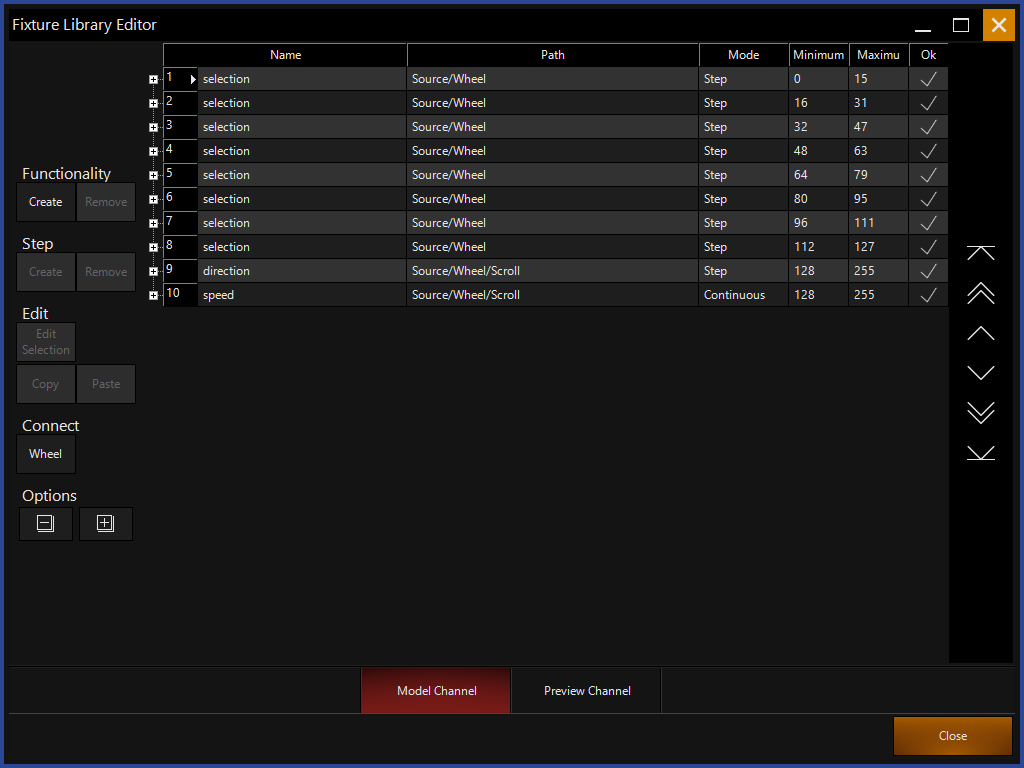
In the next window, we create the channels of the fixture, assign them properties and link them to wheels we made earlier if necessary. Press the & buttons on the bottom left to add channels. Click a channel to select it, fill in the properties on the right hand side. It is important to name parameters in this section too, especially when the fixture has multiples of the same parameter. For example, Gobo 1, Gobo 2. For unknown channels, use the Reserved channel type.
-
It is important to set the "Default" value, this is also known as the "Home" value and will be the value the channel is at when there are no playbacks active, or any data in the programmer.
-
For channels with slots, like the color, gobo wheel or shutter, press the blue , this will present you with the following window to configure the slots within the parameter.
-
In the "Edit Channel" window, each slot is assigned a minimum and maximum value. For example, Open is 0-15, Gobo 1 is 16-31, Gobo 2 is 32-47 etc. At the end of the channel, functionality such as continuous spin & scroll can be added if necessary. Scroll/Rotate ranges are built of 2 different functions. A step to define the direction, (CW/CCW/Stop) and Continuous range to define the speed (Slow/Fast). Both should have the exact same DMX value range.
-
Also, this window is where we link the color and gobo wheels we made earlier, to the channel. First, remove all of the default lines, leaving only the Scroll Functions. Then, press the button under the "Connect" option on the left hand side of the screen.
-
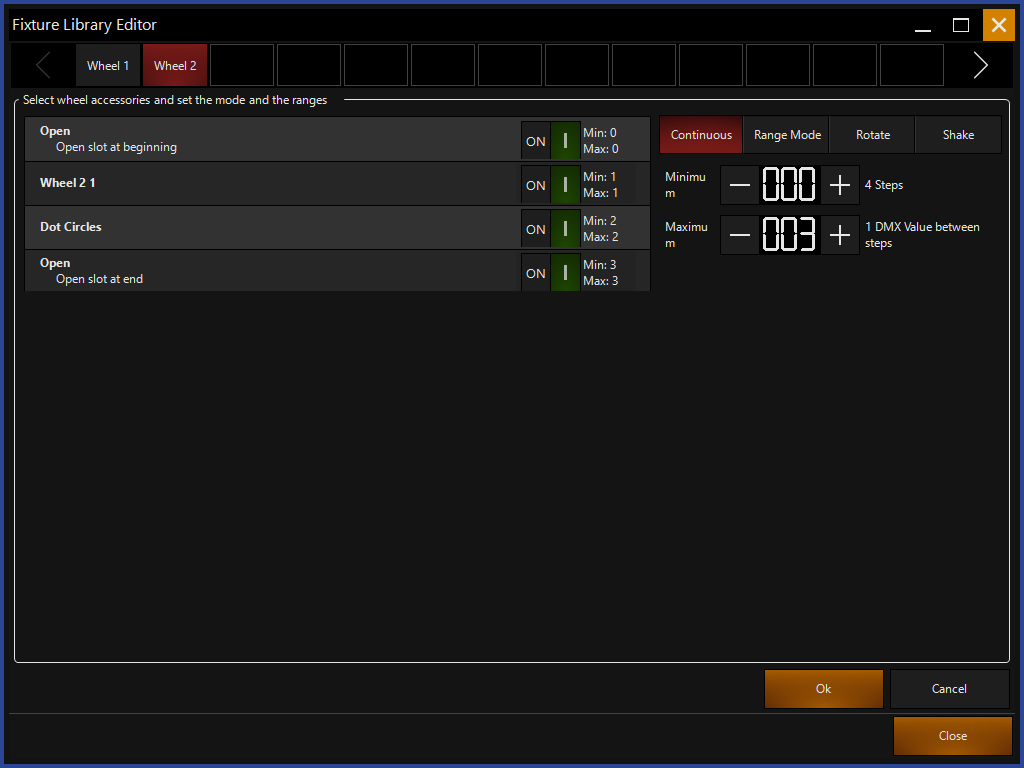
Click on the first wheel at the top of the screen, then turn each slot to "On". Set the minimum and maximum values to match the values required by the fixtures DMX protocol. In the top right hand corner of this window, for wheel slots, it is necessary to select . The , and modes are for other functionality. Once you have completed this process for all wheels, press .
-
The color slots will be added to the first "Selection" functionality. Delete the un-needed functionality by clicking on them and pressing . In this case, we are left with three. The color/gobo slot selection, the scroll clockwise and the scroll counter clockwise.

-
Enter minimum and maximum values for the scroll functionality in the same manner as the color slots earlier. Press to see how the channel will look on the console.

-
Press once the channel is built.
Before saving the fixture, it may be necessary to re-order some of the channels. For example, the 16bit channels are added to the end of the channel list by default and this may not match the DMX protocol of the fixture. Use the green arrows to the right of the channel list to move channels up and down.
- Complete the building of the other channels using the same process.
- Press , one last time and you'll be given a "Fixture Summary". Confirm on this screen that all of your details are correct.

-
Press and the fixture will be added to the "User Library". Fixtures built on ONYX can be exported for use in ONYX by using the "Export" option at the Fixture Builder start screen.