The Selected Cuelist Window

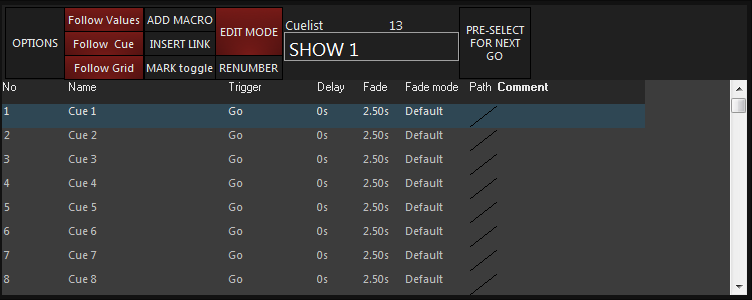
The Selected Cuelist screen is the primary display for manipulating Cuelists. You access the screen by pressing the view button, it is on the left side of this view.
Button Description
The Selected Cuelist screen contains a number of buttons with varying levels of functionality in the header of the Cuelist.
| Option | Description |
|---|---|
| This button accesses the options for the selected cuelist, a further, for more info see the Cuelist Options chapter. | |
| (Default ON) | When this button is highlighted (red), the carat, the “>>” next to Cue 1 that indicates the current cue will advance as each cue is executed, but the cuelist will not automatically scroll down following the carat. The highlight bar (the bright blue bar shown over Cue 1) will remain on the last selected cue. |
| (Default on) | With only Follow Cue selected, the carat and the highlight bar advance together as cues are executed, but the screen will not automatically scroll if the cuelist is longer than the number of cues that can be displayed on the screen. |
| (Default on) | Again, the carat will advance as cues are executed and the highlight bar remains at the last selected cue, but when Follow Grid is selected, the cuelist will automatically scroll down following the carat. |
| This button is adds a Macro to execute when the cue is triggered. Macros are covered here. | |
| This button is adds a link to another cue in the cuelist. Links specifically, will be covered later in this manual. | |
| This button enables and disables the auto-marking feature for the selected cue. Read about Mark Here. | |
|
When selected (highlighted in red) this button allows for the renumbering of cues as described in the “Renumbering Cues” chapter. When deselected, pressing or clicking on the cue numbers will load the information for the selected cue into the “Cuelist Values” screen. |
|
| This button toggles access the Add Macro, Insert Link, Name, Trigger, Delay, Fade, Fade Mode, Path, and Comment cue modifiers thereby preventing accidental changes. By default, Edit Mode is disabled. Please note that “Edit Mode” does not prevent the recording, deselecting or editing of cue contents; it pertains only to the cue modifiers listed above. Also, the “Edit Mode” button will maintain its state (locked or unlocked) regardless of the Cuelist or view displayed. | |
| When enabled (red), you can jump to any cue in the Cuelist by selecting it in the number (No) column. The cue specified will have a red box around its number and will execute on the next Go. |
In addition to these buttons, you will find text that tells you the cue type (Cuelist, Chase, Override. etc.) and the Cuelist number (in this case Cuelist 13). Directly below this is the Cuelist label. By default, the Cuelist label is the same as the Cuelist number.
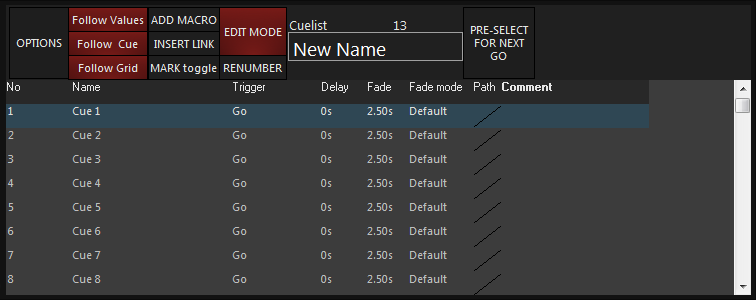
To edit this label:- Ensure that is active (red)
- Select the default text ) by touching or clicking on the text on the touch screen.
- The text will highlight in red.
- Using the keyboard, enter the desired text.
- Press and the Cuelist will be relabeled.
Note that the new label is also displayed in the appropriate Cuelist selection and that the Cuelist number, found above the label on the touch screen remains unchanged.

Cuelist Table Description
Just below the Selected Cuelist screen buttons are eight columns, each of which provide specific information about the cues in the list.
| Option | Description | ||
|---|---|---|---|
| No | This is the cue number. The cue number can range from .0001 to 99999.9999 | ||
| Name | The default cue name is the same as the cue number. The process to change the cue name is similar to changing the Cuelist name and is detailed below. | ||
| Trigger | The four trigger types (Go, Wait, Follow and Timecode) and any associated timings are listed here. Further information on triggers can be found in “Setting Cue Triggers”. | ||
| Delay | Any delay time is displayed here. An “Override” column will be added to the right of the Delay column if a Delay Override is recorded. Cue timing is discussed later in this manual. | ||
| Fade | The fade time of the cue is displayed here. An “Override” column will be added to the right of the Fade column if a Fade Override is recorded. Cue timing is discussed in the next section. | ||
| Fade Mode | There are three fade modes. | ||
|
|||
|
|||
|
|||
| Path | This is the fade style, or “path”. The path is selected by clicking the graphic in the path column (with Edit Mode enabled) and selecting the desired style in the pop-up window. The five path styles are: | ||
|
|||
|
|||
|
|||
|
|||
|
|||
| Comment | This column allows you to insert notes or comments about the cue. Up to 21 characters can be entered. The process to enter a comment is similar to other labeling functions and is detailed below. |
Labeling a Cue
- Ensure that is active.
- Select the default text () by touching or clicking on the text on the touch screen.
- The text will be highlighted in red.
- Using the keyboard, type in the desired text.
- Press Enter and the cue will be relabeled.
Labeling a Comment
- Ensure that is active
- Select the comment to be edited by touching or clicking on the text on the touch screen.
- The column will highlight in red.
- Using the keyboard, enter the desired text.
- Press Enter and the comment will be applied.