Adding Elements to the 2D Plan View
The 2D Plan View can display individual fixtures, groups, grouping tool masks and objects.
To add elements to the 2D view, first enter "Edit Mode" by pressing the triangle icon labeled :

Then, press , and you'll see this popup:

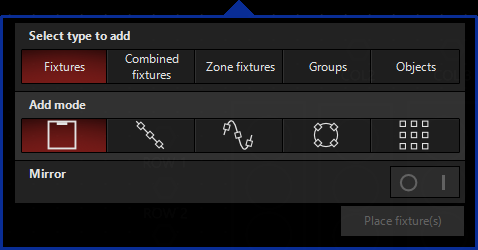
In the top segment of the popup, you're able to select to add Fixture, Combined Fixtures, Zone Fixtures, Groups or Objects.
Once you've chosen the type to add, you can press below to select the specific elements you wish to add to the 2D Plan View. Fixtures need to be selected before pressing .
The other elements will toggle, such as Group, where you see a miniature version of the Groups window.
If you are using Zone Fixtures for the first time in a show file, you'll need to first press .
At the bottom of the Groups tab, you are also able to select between Groups, Masks and Auto Groups:

Next, select the add mode. This determines how you'll add the selected elements to the 2D Plan view:

Last, you can choose to mirror our fixtures:

And if you turn that on, you'll be able to choose "Custom", "Horizontal", or "Vertical": This will allow you to set the mirror line you desire.

Last, press the button. It will read "Place X", with X being Fixtures, Combined Fixtures, Zone Fixtures, Groups or Objects, depending on the tab you're in:

Now, you'll see instructions at the top of the 2D Plan window directing you to use the tool you've selected. For example, in this image, I'm using the "Line" add mode:
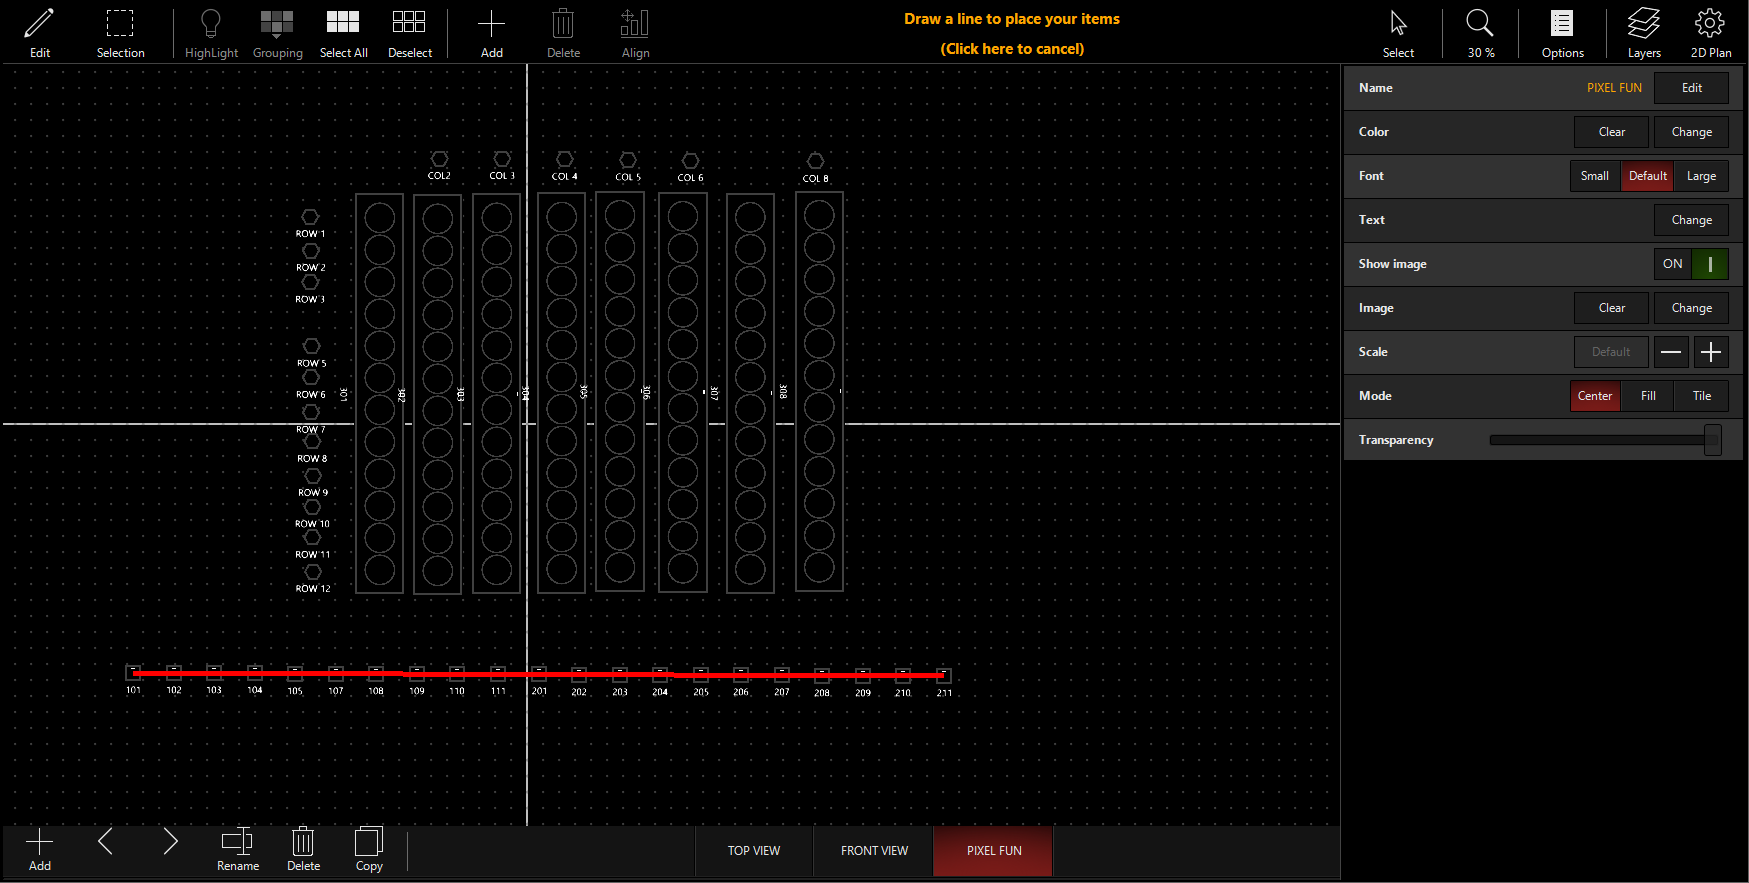
Continue to add more Fixtures, Groups and Objects, until you are finished. Then, press the icon to get back into Live mode:

Using the Grid Add Mode
The Grid add mode works just like the standard add modes, but offers the ability to place fixtures in a grid. When you select the grid mode, you'll see the ability to set the number of columns. ONYX will automatically calculate the number of rows based upon the total number of elements selected.
