Fixture Fanning
The Fan tools provide a powerful means to manipulate a group of fixtures by spreading their attribute values over a range.
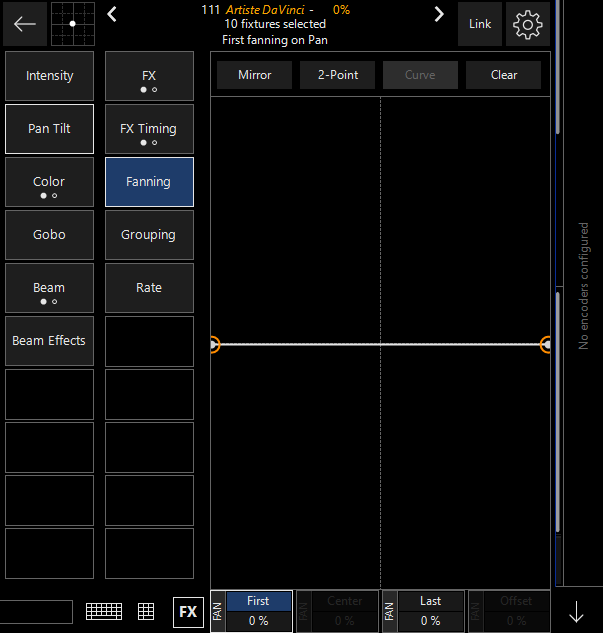
To bring up the fan tools, select some fixtures and bring up the CV popup by using the up arrow in the bottom right corner. Then press the parameter group button labeled “Fan”.
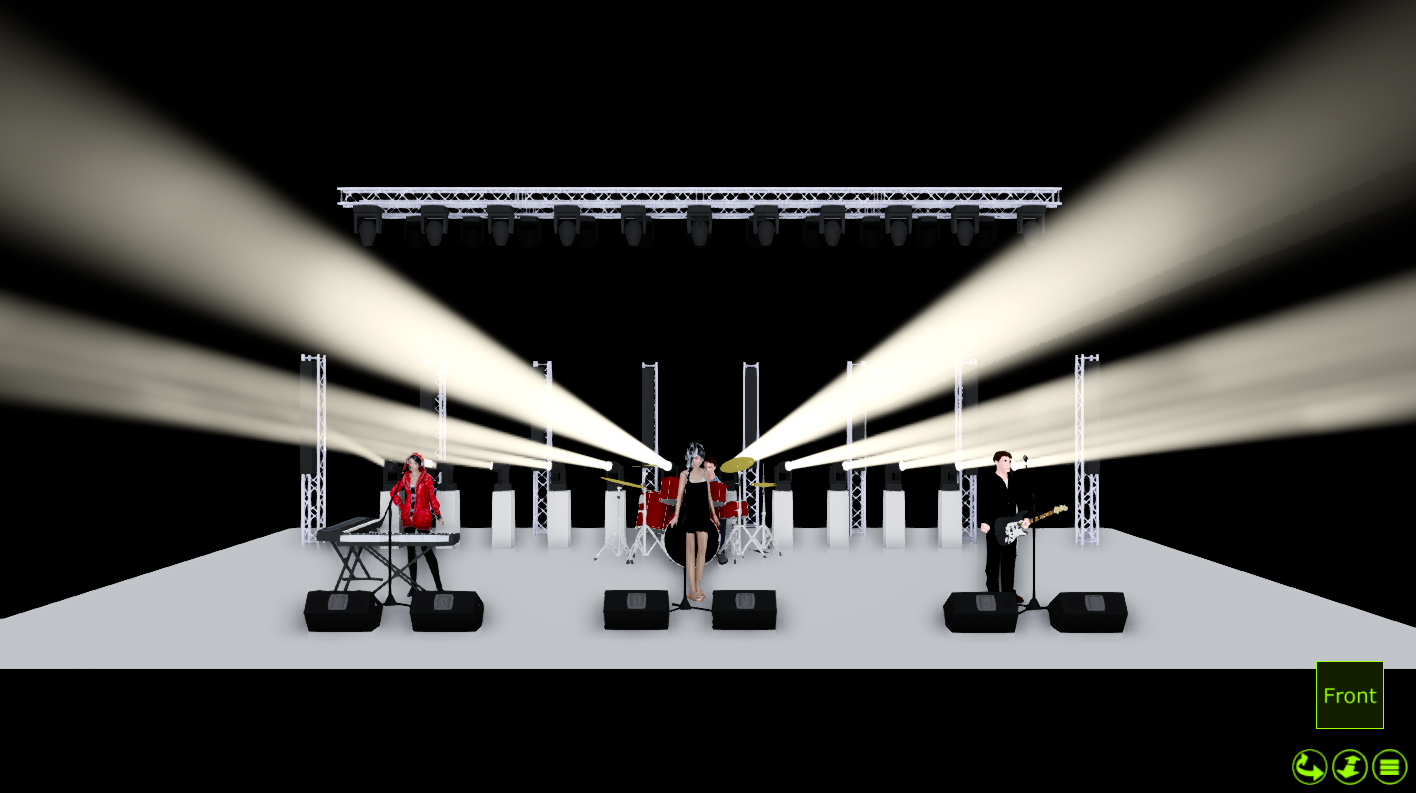
The Channel Visualizer will now look something like the screen shot below.
The encoders/belts of the console will be mapped as follows:

Near the bottom of the screen are 4 labels that identify the function of the track belts.
| Option | Description |
|---|---|
| First | This label corresponds to the left point (as indicated by the white dot in the fan display) and controls the position of the first fixture selected in the fan. |
| Center | Center designates the center point of the fan. (Only available with 3 point fanning) |
| Last | Last is the right white dot on the fan display and controls the position of the last fixture selected in the fan |
| Offset | Offset is used to control how far toward “First” or “Last” the center point is considered to be. (Only available with 3 point fanning) |
Each of these settings can be adjusted between -100% and + 100%. In the display above they are all shown at zero percent as indicated in the box below each label.
Note that the attribute that will be affected by the fan position control elements is pan (“Fan on Pan”). This is determined by first selecting the attribute type “Pan Tilt” and then pressing the button in the column labeled “Pan”.
Above this are 4 toggles. Pressing or clicking on them will cause them to change from one type of effect on the fan to another. The buttons and their alternate are both shown below:


| Default | Alternate | |||
|---|---|---|---|---|
 |
Mirror - When Mirror is selected, the first and right points will mirror each other. For example, if the first point is used to pan left, the last point will automatically move right and equal, but opposite amount. |
 |
Separate - When selected, Separate allows the first and last points to move independently. That is to say, if the first point is used to pan left, that first fixture and all other fixtures except for the last will move left proportionately to one another. | |
 |
2-Point - When active, 2-Point allows for the manipulation of first and last fixtures to determine the fan and the center point is used to determine the fan’s overall position |
 |
3-Point - When 3-Point is visible, the first and last points are left unaffected by changes to the center point. Instead, an arc is formed. | |
 |
Curve - Curve will cause the fixtures in the fan to follow a curvilinear path. The degree of the curve is determined by the center point when in 3-Point mode |
 |
Linear - Similar to curve, except that instead of a curved path, a linear one is followed. This is the only mode available in 2-point fan. | |
|
|
Clear - Pressing this button will clear all fan effects. |
|
Clear - Pressing this button will clear all fan effects. |
Examples of Fixture Fanning
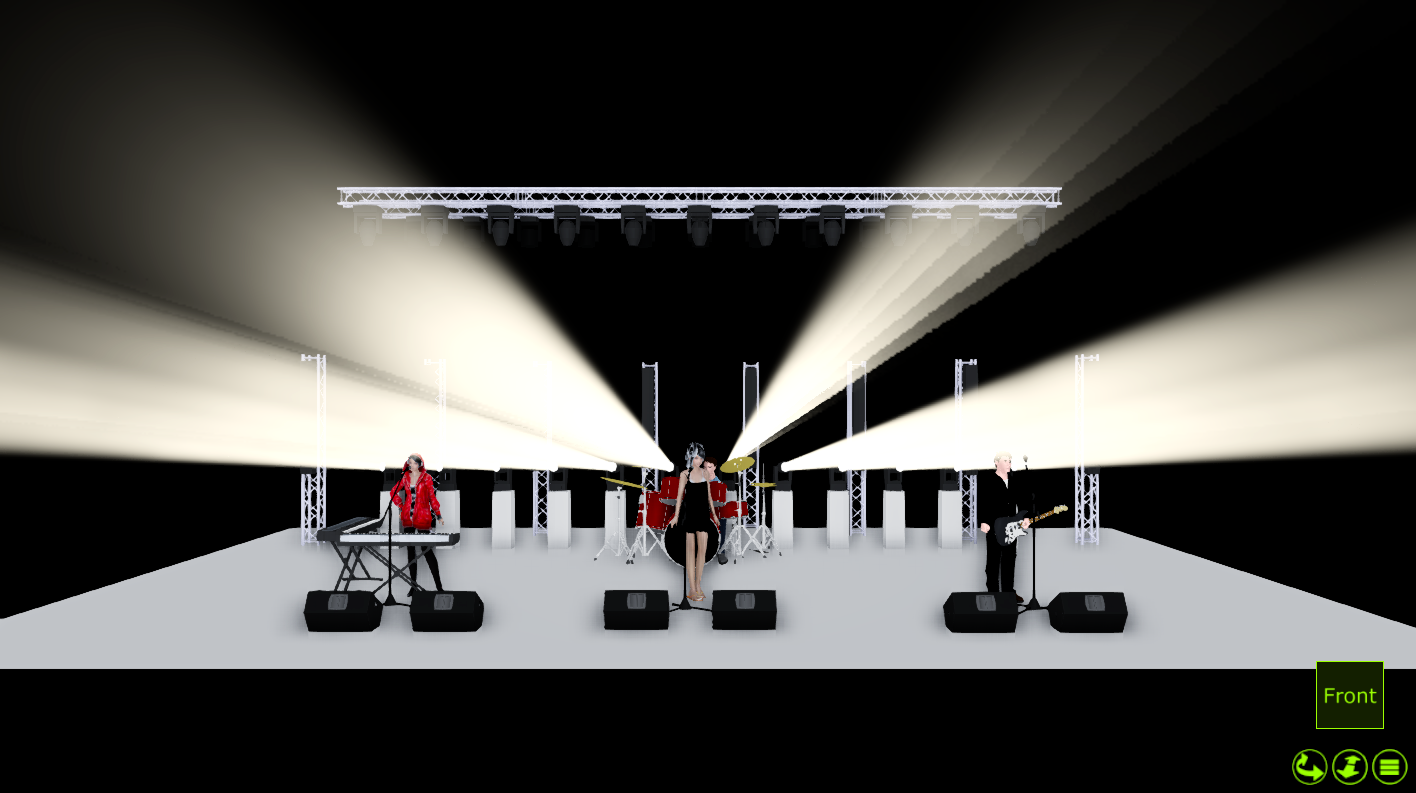
The Dartz 360 Group of fixtures will be used for this example. Build a crowd blinder position preset as shown below to use as a starting point.
Mirror vs Separate Fan
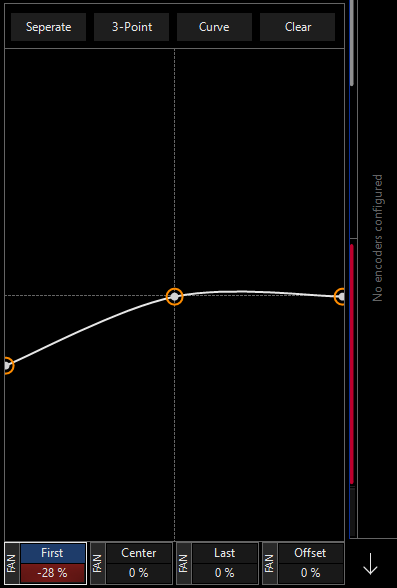
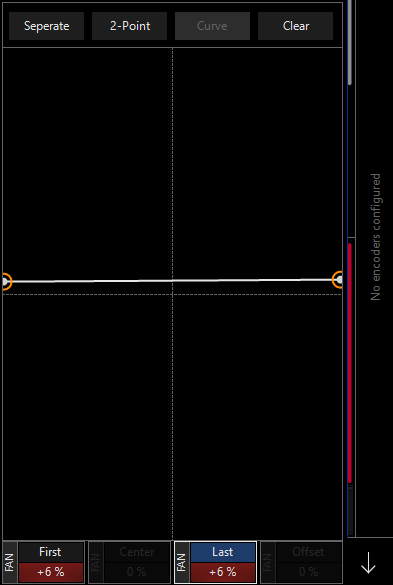
Starting at the “Blinder” preset that we just created, with “Fan on Pan” in 3-Point linear mode the following shows the difference between Mirror and Separate modes when moving only the First fan attribute track belt.
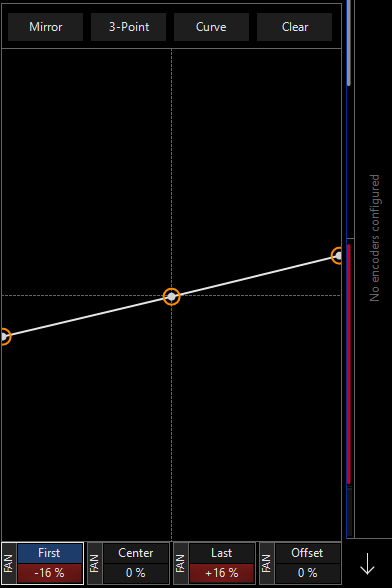
As you can see, in the Mirror example, the First and Last attributes are at +/-16% even though only the First fan attribute was adjusted. This is because as the First fan attribute was altered to -16%, the Last fan attribute mirrored it and moved to +16%.
In the Separate example the First fan attribute is at -28% but the Last fan attribute has remained at 0%. You can see how the left half of the lights moved much, and the right half moved very little. Look at the left-most light - it's actually turned so much it's pointing behind the stage!
2-Point vs. 3-Point Fan
Start at the “blinder” preset that you created above. With “Fan on Tilt” in separate and linear mode, the following shows the difference between 2-Point and 3-Point modes.
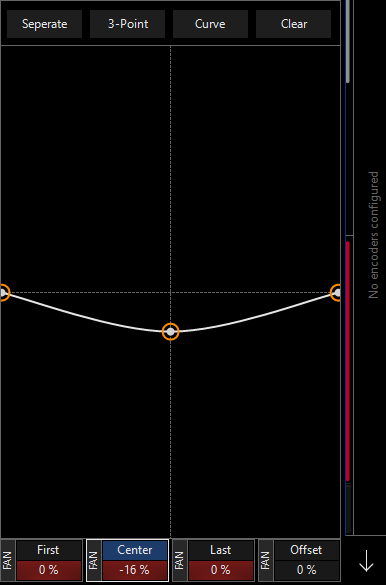
In the 2-Point example, moving the Center fan attribute only to +6% resulted in both the First and Last fan attributes also moving to +6%. In other words, it acted much like the traditional tilt attribute. In the 3-Point example, moving the Center attribute to -16% left the First and Last attributes unchanged (0%) and distributed a percentage of change to all fixtures between the first and last fixtures selected.
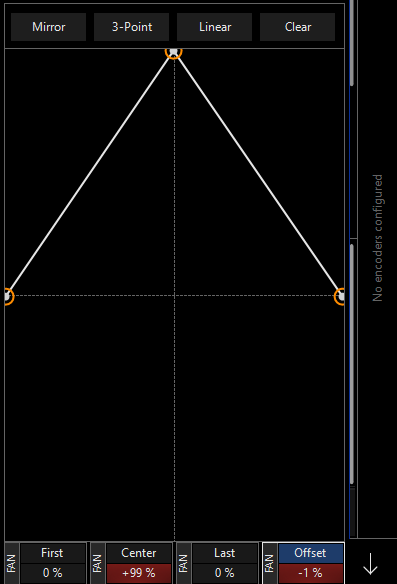
Curve vs Linear Fan
Select the Dartz 360's and tilt them forward to 30%, with “Fan on Tilt” in mirror and 3-Point modes, the following shows the difference between Linear and Curve options within the Fan window.
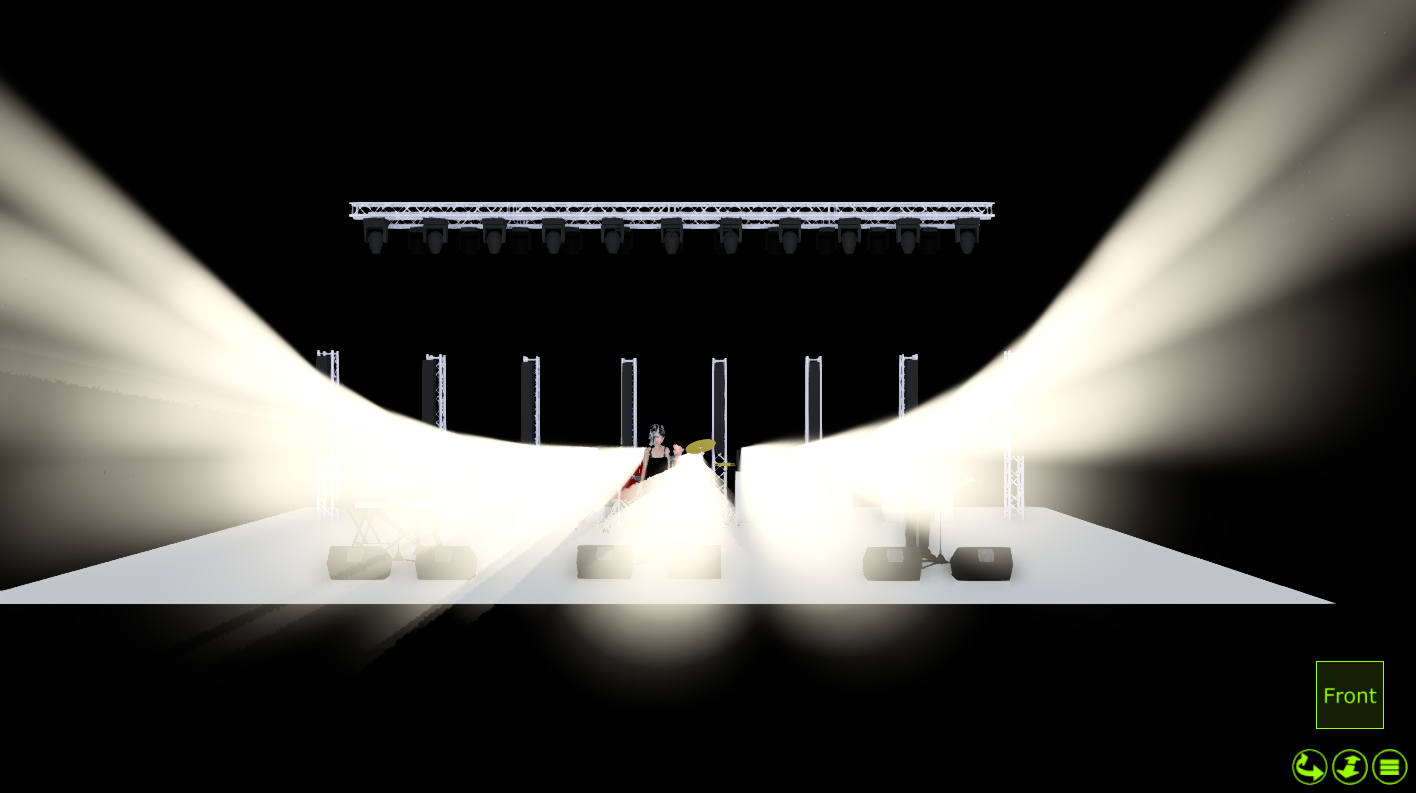
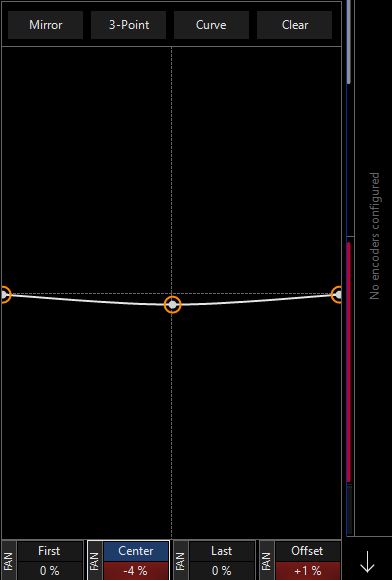
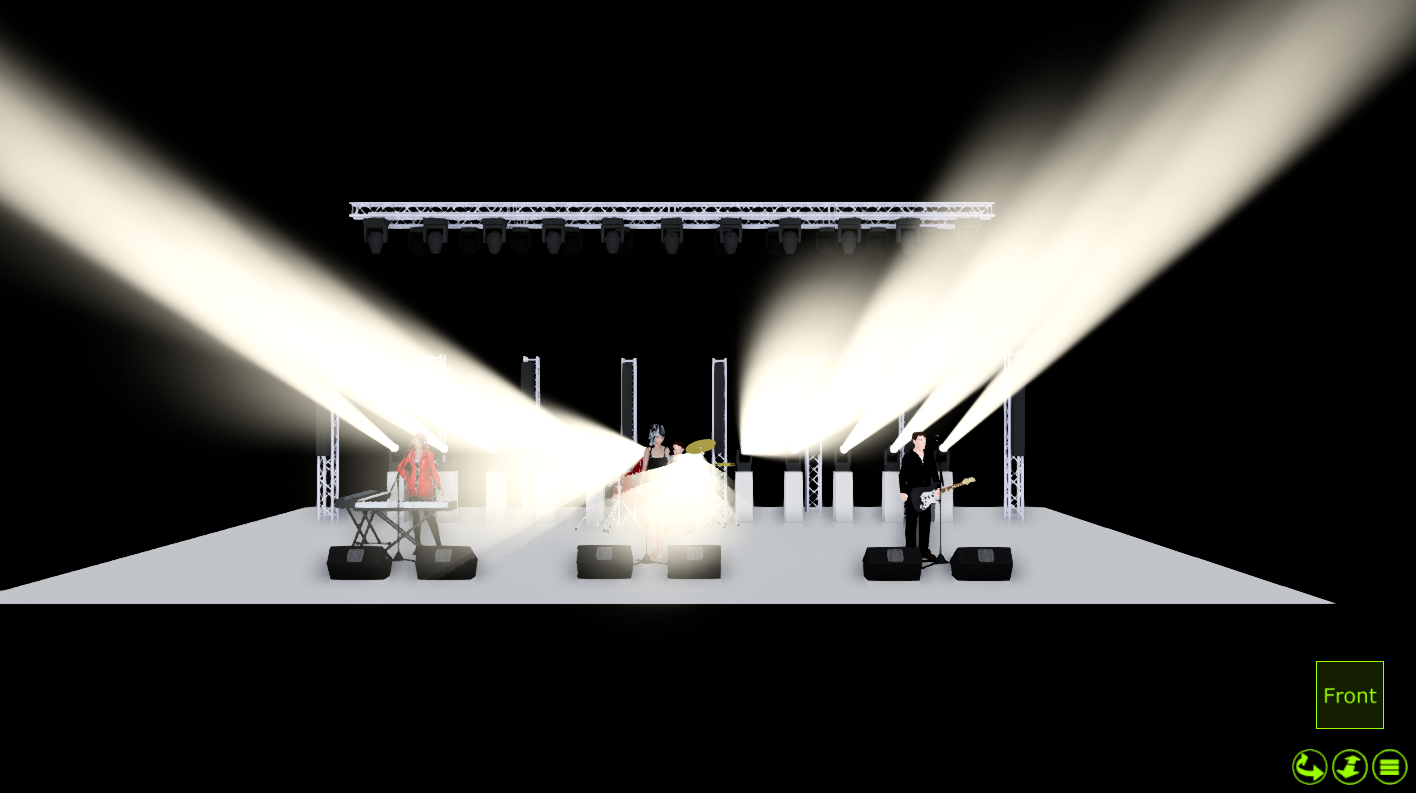
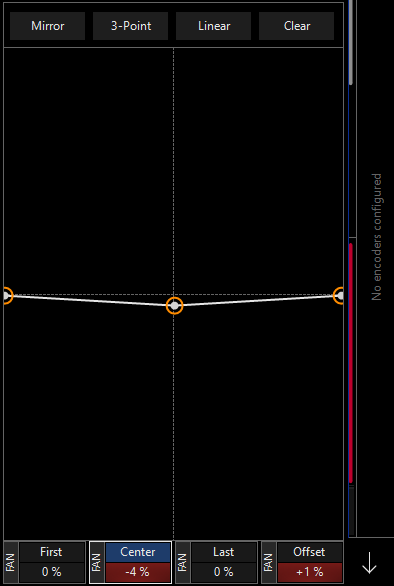
Moving only the Center fan attribute to -4% in Curve mode results with a nice, smooth curve to the lights. However, when in Linear mode, it's no longer a curve, but a straight "V" type shape.
You can likely see from this example show both types of fanning can be useful in your show.
Other Fan Types
The examples above have used the pan and tilt attributes to demonstrate the fanning functions. However, it should be noted that any attribute can take advantage of the fanning function.
In the this example, the linear 3-point fan is used on the green attribute. The color is achieved by bringing red to full and uses a mirrored 3-point linear fan with the Center fan attribute at +100%.