Color Coding Presets
It's possible to color code the contents of directory items for ease of identification and organization.
Two different options are available and can be used separately or together; according to user preference. By default, both are disabled.
The first option is "Preset Color", this option allows you to put a colored tag on the Preset button to suit user identification. For example the Red Preset can have a Red tag, the Green Presets can have Green tags etc.
The second option is "Grid color", this simply changes the background grid color for the window, corresponding to the Preset types. So the grid colors can be different for each preset type, allowing the user to quickly identify which page of presets is active.
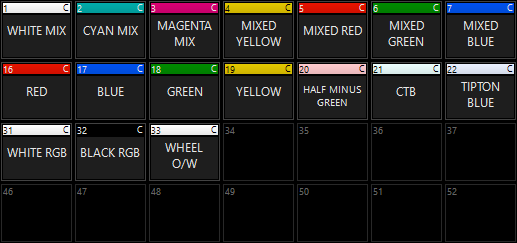
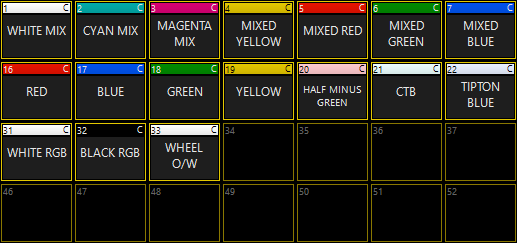
The options are shown here:
Preset Color (No grid color)

Grid Color & Preset Color

As you can see from the images, the Preset color option is completely user definable and is shown in this instance with a matching color labels on the presets defined by the color stored inside them.
The Grid Color defines the color of the directory grid and its outlining text & buttons.
The grid color only pertains to the specific tab in which it is assigned, so the each parameter group's grids can all be different colors. You are free to enable both options simultaneously.
To Color Code the Preset Buttons:
- Open the Preset window.
- Press the Options "Gear" icon in the right hand corner of the window.
- Enable the option and press the Button associated with it.
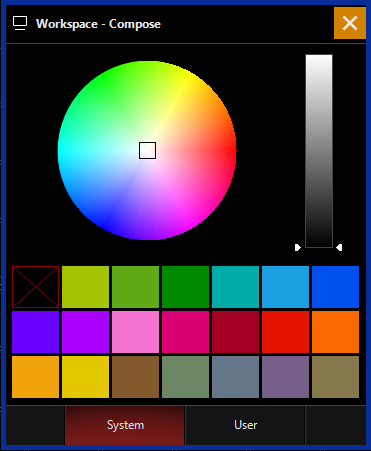
- A pop-up window shows a color picker as well as a number of predefined colors.
- Press a Preset in the directory and then pick a color from the options.
- Repeat the process of pressing a Preset, then applying a color to color code the desired Presets.
- To finish, close the pop-up color picker by pressing the icon in the top right corner. The Presets will retain their color settings until either the color is changed, or the option is turned off again.
To Color Code the Preset Grids:
- Open the Preset window.
- Press the Options "Gear" icon in the right hand corner of the window.
- Enable the option and press the button associated with it.
- A pop-up window shows a color picker as well as a number of predefined colors.
- Choose a tab to color code using the options on the left hand side, note that each tab can have a different color if desired.
- Once finished, close the window using the icon in the top right hand corner, the tabs will retain their grid color options until either they are changed, or the option is disabled.
For reference, this is what the color picker looks like, both here and for other functions within ONYX:
