Patch Import Options and Customizations
Changing the Fixture Type to Import
Before importing, you may also press with the fixture type field to change the fixture type and/or mode before importing. After pressing one field or pressing and dragging to select multiple fixtures, the Fixture Library pop-up now appears:

You may now navigate to the fixture type and mode that you desire the fixtures to be patched in. To choose the fixture type, press .
Lastly, this pop-up will appear to choose whether only the selected fixtures will adopt the new type, or if all fixtures of the source type will change to the chosen type:

Once chosen, you may now proceed with importing your patch. If the fixture type you chose uses more channels than the previous fixture type, you will get conflicts as the patch imports.
Resolving Conflicts in the Patch Import
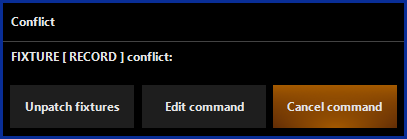
If a fixture that is being imported conflicts with a current patch, the patch conflict window will appear:

Pressing will import the fixture, but not patch it at a DMX address, so you can set the address after import.
Pressing will allow you to activate the command line for editing, at which point you can specify an address.
Pressing will clear the command and no action will be taken.
Unassigned Channels Detected
If channels being imported are not part of the default or your customized parameter group assignments, you may see this window. Read more at "Unassigned Channels Detected"