Cuelist Options
Cuelist Options is a window that allows you to customize how the selected playback reacts, beyond just the playback type.
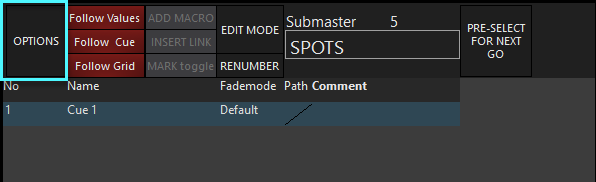
The Cuelist Options window can be accessed by pressing the button in the Cuelist Values view, from the playback popup or by right clicking on the playback assignment.
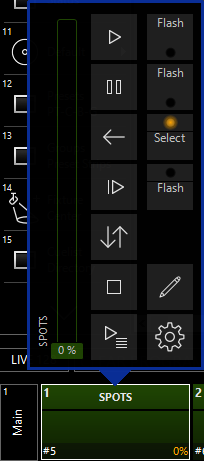
You may also right click on a cuelist in the Main Playback Bank Indicator, then the Options will open. You may also double tap on the cuelist in the Main Playback Bank Indicator and use the wheel icon to open the options. The options can be accessed in this manner for any cuelist type.
The Cuelist Options window is spit into two distinct parts, Mode and Options.
The Mode column, on the left side, allows you to change the type of cuelist from the available cuelist types.
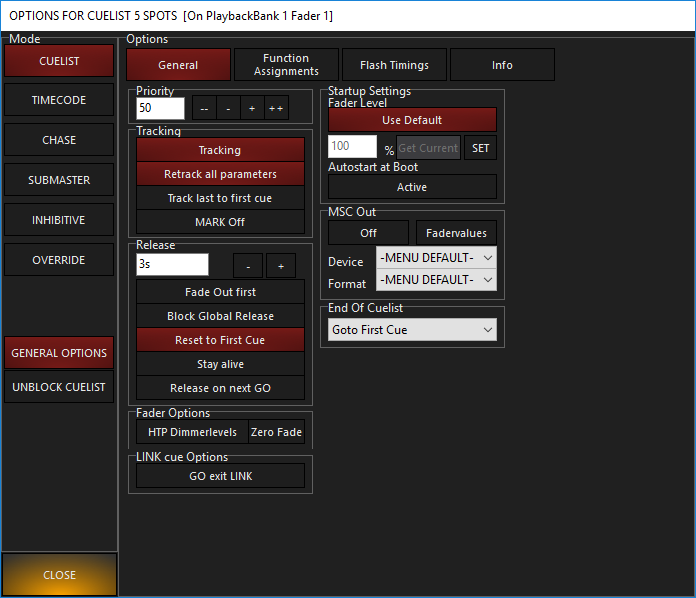
For now, we will focus on the Cuelist Options.
To the right of the cuelist modes are several other settings that may be applied to the cuelist.
There are a "standard' set of options that appear for every cuelist, and then additional options for each type of cuelist. (except for Cuelist - this just has the standard options).
Common Cuelist Options
There are five Cuelist Option groups that are common to each type of cuelist. These groups are explained below, and in greater detail below the following chart.
The groups that are specific to a certain cuelist type will be discussed on each cuelist type page.
| Item | Explanation |
|---|---|
| Priority | This sets the priority of a cuelist. |
| Tracking | This determines how the cuelist deals with tracked values. It also includes a control for the console's Auto Mark feature. For more information, see "Auto Mark." |
| Release | This section determines behavior when a cuelist is released or restarted. |
| Fader Options | This determines the behavior of fixture intensity in relation to the positioning of the cuelist fader. |
| LINK cue Option | will allow you to force exiting a loop created by links, by pressing . |
| Startup Settings |
Here you can set a default fader level or cause the cuelist to run automatically on console power up. (Autostart at Boot) |
| MSC Out | Allows you to enable MIDI Show Control output from this cuelist. |
| End of Cuelist | Gives you different options to choose from when you hit the end of your cuelist. The default is to loop back to the first cue. |
Priority
The console assigns a priority to every cuelist. The priority setting can range from 1 to 100 with 100 being the highest priority and 50 being the default. A higher priority cuelist will take precedence over a lower priority cuelist. The priority setting can be incremented or decremented by one ( and ) or ten ( and ). The behavior of fixtures in the cuelist depends on the order in which the cuelists are activated and the contents of the cuelist.
Tracking Cuelist Options
The Tracking section of the Cuelist Options screen contains settings that can have a very significant impact on the behavior of cues in your show.
Tracking (DEFAULT ON)
As mentioned earlier, ONYX is, by default a tracking console.
When a change is made, it tracks that information forward though the cuelist.
When tracking is off for a cuelist the only information that is recorded into that cue or played back is the information that is in the Programmer when the cue is recorded.
For example, if cue one contained intensity information only and cue 2 contained pan/tilt information only when it was recorded, with tracking turned off, the fixtures will move when cue 2 is executed, but, as there was no intensity information in the Programmer at the time cue 2 was recorded, the fixtures will fade to zero intensity.
Retrack all parameters (DEFAULT ON)
As mentioned earlier, the console is a “Latest Takes Precedence” console. This means that a recorded cue contains only those values that have changed from the previous cue.
When going through the cuelist sequentially from the top, this wouldn’t necessarily be noticed.
However, if you were to start in the middle of the cuelist you might see, for example, only a color change if that was all that was recorded in that cue.
The Backtrack function will read the state of the cue rather than just the attribute information recorded in that cue.
In other words, it will look back to the previous cues and apply all attribute changes that have been made up to that point. By doing this, if you start in the middle of the cuelist, the look on stage will be the same as if you had stepped through the cuelist from the beginning.
Track last to first cue (DEFAULT OFF)
When stepping forward from the last cue, the cuelist will cycle back to the first cue. With "Track last to first cue" enabled, values that were active in the last cue, but are null in the first cue will persist as the cuelist loops back to the first cue. When this is disabled, the values will become null again when looping to the first cue.
MARK Off (DEFAULT OFF)
The MARK function is discussed in detail later. For more information, see " Auto Mark ."
Release
The Release Cuelist Options determine behavior when a cuelist is released or restarted.
Fade Out first (DEFAULT OFF)
When enabled, intensity values will fade out in the specified default time first, and then all other attributes will follow once the intensity has reached zero, again in the specified default time.
Block Global Release (DEFAULT OFF)
When selected, global release commands are ignored. Common uses for this include houselights, worklight, hazers, or any other element that needs to remain active unless deliberately released.
Reset to First Cue
When enabled (red), the cuelist resets to cue 1 when released. When disabled (gray), the cuelist does not reset, it will resume from the stopping point on the next go.
Stay alive (DEFAULT OFF)
Stay alive determines the actions of attributes that are common between two different cuelists. When Stay alive is activated, cuelists will continue to run in the background when overridden, but their parameters will not be active unless the overriding cuelist releases.
An example is the best way to describe the function of Stay alive:
Example with Stay alive ON:- Cuelist A controls attributes x, y, and z.
- Cuelist B controls attributes x, y, z, and any other attributes.
- In Cuelist A, is ON (highlighted in red.)
- Cuelist A is running. When cuelist B starts, cuelist B takes control of attributes x, y, and z.
- Cuelist A stays running, but cuelist B controls the parameters.
- When Cuelist B is released, attributes x, y, and z go back to Cuelist A's control.
- Cuelist A controls attributes x, y, and z.
- Cuelist B controls attributes x, y, z, and any other attributes.
- In Cuelist A, is Off (not highlighted in red.)
- Cuelist A is running. When cuelist B starts, cuelist B takes control of attributes x, y, and z.
- Cuelist A releases because cuelist B is controlling attributes x, y, and z.
- When cuelist B is released, attributes x, y, and z return to their default settings (assuming no other cuelist with Stay alive enabled exists with those attributes).
In order for Stay alive to function in the manner described above, the cue in cuelist B must contain all the attributes of the cue in cuelist A. Otherwise, when cuelist B is released, those attributes taken from A will be sent to zero
Release on next GO (DEFAULT OFF)
When this option is selected, the next Go command from any other cuelist (not the cuelist that you are modifying) will release the current cuelist.
Fader Options
| Item | Explanation |
|---|---|
| HTP Dimmer levels | When enabled (red), this option changes the fader’s default LTP behavior to HTP (highest takes precedence). HTP dimmer levels will neither override nor be overridden by LTP faders. |
| Zero Fade Dimmers | When using HTP dimmer levels, this option causes the intensity to snap to programmed levels, ignoring the cue fade time. |
LINK Cue Options
will allow you to force exiting a loop created by links, by pressing .
To explain further, let's pretend you made a cuelist with 5 cues.
Cues 1-4 get set up using LINK to repeat in order infinite times.
Cue 5 is a "dump out" look.
By turning on , you may now press the GO button for that cuelist to dump out of the link loop.
Note that you must be in a "delay" state - no cues fading in or out - for GO to exit the link.