Workspaces
All assignments of items to the sidebars, Function Keys, and Views are stored in a workspace. When you launch a show, you are greeted with the built-in Workspaces titled "Compose", "Playback", "DJ", and "Examples".
You can edit the existing Workspaces, or create your own from scratch. But we're getting ahead of ourselves here - first, let's figure out how to access them!
Accessing the Workspaces
When your show loads, you are automatically brought into the last used Workspace from that show file.
To view the Workspaces in the file, or to change Workspaces, first press the Workspace Browser icon at the top left of the screen:
![]()
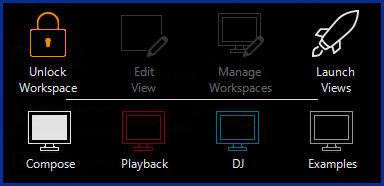
You'll then see the Workspace browser pop down:

To switch Workspaces, simply click the "monitor" icon with the label of the workspace you wish to enter.
You can change Workspaces whenever you'd like - for different parts of your show (i.e. programming vs. playback), or for different users who are working in the show file.
Creating a New Workspace
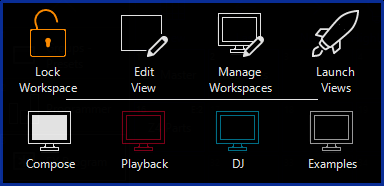
From the Workspace browser, you'll first need to press to allow for editing. The Unlock Workspace icon will then toggle to .

Then, press from the Workspace browser, and you'll see this:

As you can see from the icons at the bottom of this popup, you are able to do a variety of things with your Workspaces.
First, press the icon to create a blank Workspace to start from scratch.
You'll be presented with a demo View layout in edit mode, which you can then edit or delete as you please.
Learn more about editing Views by clicking here.
When you're done, it's a good idea to re-lock your Workspaces, so that you don't accidentally get into view editing. Do this by clicking the Workspace browser icon in the top left of your screen, and press .


Launch Views
The last button on the right in the Workspace browser is to Launch Views:
![]()
When you press Launch Views, you'll then open the Launch Views popup, which will allow you to temporarily open one of your predefined views or a single window in your current Display.

Learn more about launching Views on the Views page.
Editing Existing Workspace Views
If you like the Views in the current Workspace, but just want to tweak them a little to meet your needs, you can do that as well!
Workspace Management Reference
There are some more in-depth workspace settings available. Navigate to them by pressing the Workspace icon at the top of the screen, Unlock the Workspace, and press "Manage Workspaces" to see this menu:
![]()
First, the button allows you to create a new, blank Workspace.
The icons give you control over the display order of the Workspaces.
gives you the opportunity to name your Workspace as you wish.
gets rid of your workspace. You'll receive a popup asking you to confirm, because delete truly does delete the Workspace forever!
allows you to make a copy of the selected Workspace, which you can then customize independantly.
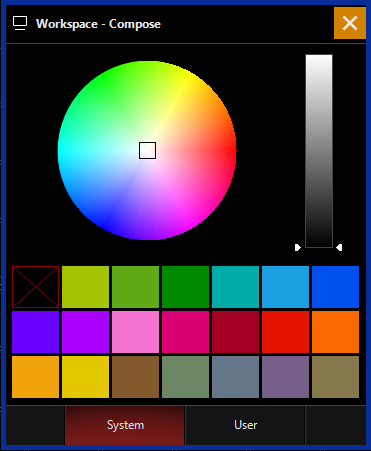
allows you to set a custom color for your workspace. When you press Color, you'll see this color picker:

You may then choose a color from the palettes below, or define a custom color by selecting it in the color picker. Once the color is assigned, you'll see it in your Workspace like this:

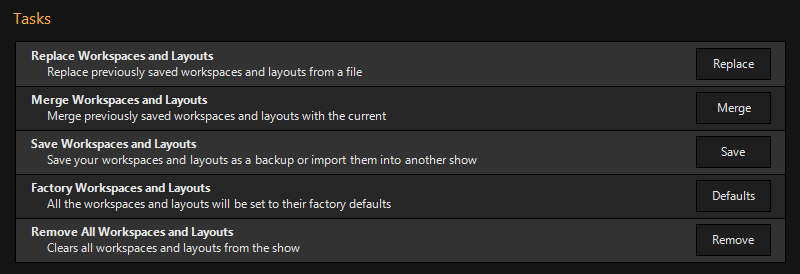
Pressing will take you to the main menu, and the Workspaces and Layouts Tasks window. This window allows you to , , , or reset your workspace to the .
You can see the descriptions of these functions in the menu here:

When you're done, it's a good idea to re-lock your Workspaces, so that you don't accidentally get into view editing. Do this by clicking the Workspace browser icon in the top left of your screen, and press .

