Zone Setup
DyLOS composes content onto pixels within your lighting rig using Zone Fixtures.
Zone fixtures are set areas within the 2D Plan window that contain fixtures. The fixtures inside of the Zone fixture will react to the mapped parameters from DyLOS to the degree which they are capable. And for those parameters that a particular fixture is not capable of, Mapping can be customized to make it react...
Creating a Zone Fixture
Zone Fixtures are created from the 2D Plan window.
While you can create a Zone first and then add fixtures to it, most users find it simpler to lay out their fixtures first, then create a Zone Fixture on top of them. That way, you can size it perfectly the first time!
Navigate to the 2D Plan view and enter "Edit Mode" by pressing the icon:

Go to and choose the type from the top of the popup. By default is selected and this is what we will use since we have not created any Zone Fixtures yet.
Press and you will be able to draw a rectangle as your Zone Fixture by pressing and dragging or using a mouse/trackball:
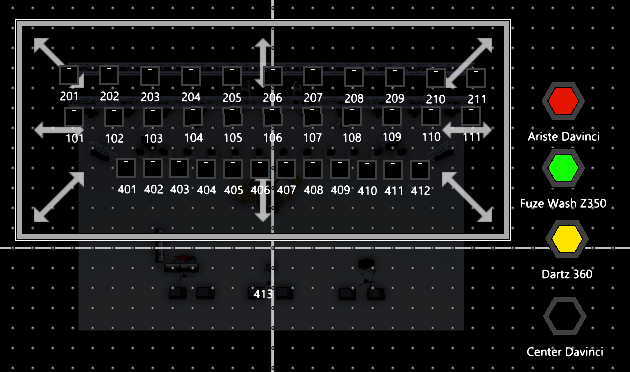
In this example, I am using the Demo show file and adding a Zone to illustrate the point. Use your own showfile or utilize the demo show file (which has Zone fixtures already created) to follow along!
When your Zone Fixture is ready, you may use the arrows that appear in Edit Mode to re-size your Zone as desired. Your Zone Fixture can be re-sized at any point in the future in Edit Mode. Changes made when re-sizing are visible live via the DMX output to your lights as you make them.
Placing an Existing Zone Fixture
If you have an existing Zone Fixture and simply need to place it, the process is very similar.
Note: to place a previously created Zone Fixture, it must be deleted from it's previous 2D Plan. A single Zone Fixture cannot be placed in multiple places.
Make sure you are in "Edit Mode" by pressing the icon at the top of the 2D Plan View. This will toggle the icon to to indicated that you are in Edit Mode.
Go to and choose the type from the top of the popup. Then, choose , and you will be able to place your Zone on the 2D Plan view by pressing and dragging.
Resizing and Moving a Zone
When a Zone is selected within the 2D Plan in Edit Mode, you may re-size the Zone in any direction using the provided arrows. Press and drag to extend the Zone in any direction. You can also can move a Zone by pressing in the center of the zone and dragging.
Now that we've gotten our Zone setup, let's dive in and learn about the Basic Zone Principles.