Static Palettes
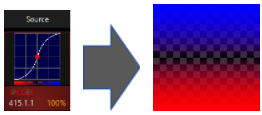
Palettes offer the ability to color or re-color content in DyLOS to match any color scheme you wish. When a palette is applied, the colors in the palette are applied to the content based on the brightness of each pixel - the content is essentially converted to grayscale and then mapped to color based on the palette's range of colors and opacities.
Palettes can be created in the Owner and User content libraries.
For information regarding Dynamic Palettes.
Creating Your First Palette
- Navigate to the view, button 4 on the default sidebar of the "Compose" workspace.
- Select a Zone master fixture, and in the Zone Parameters (the bottom half of the view), press , then in the upper left hand portion of the window:
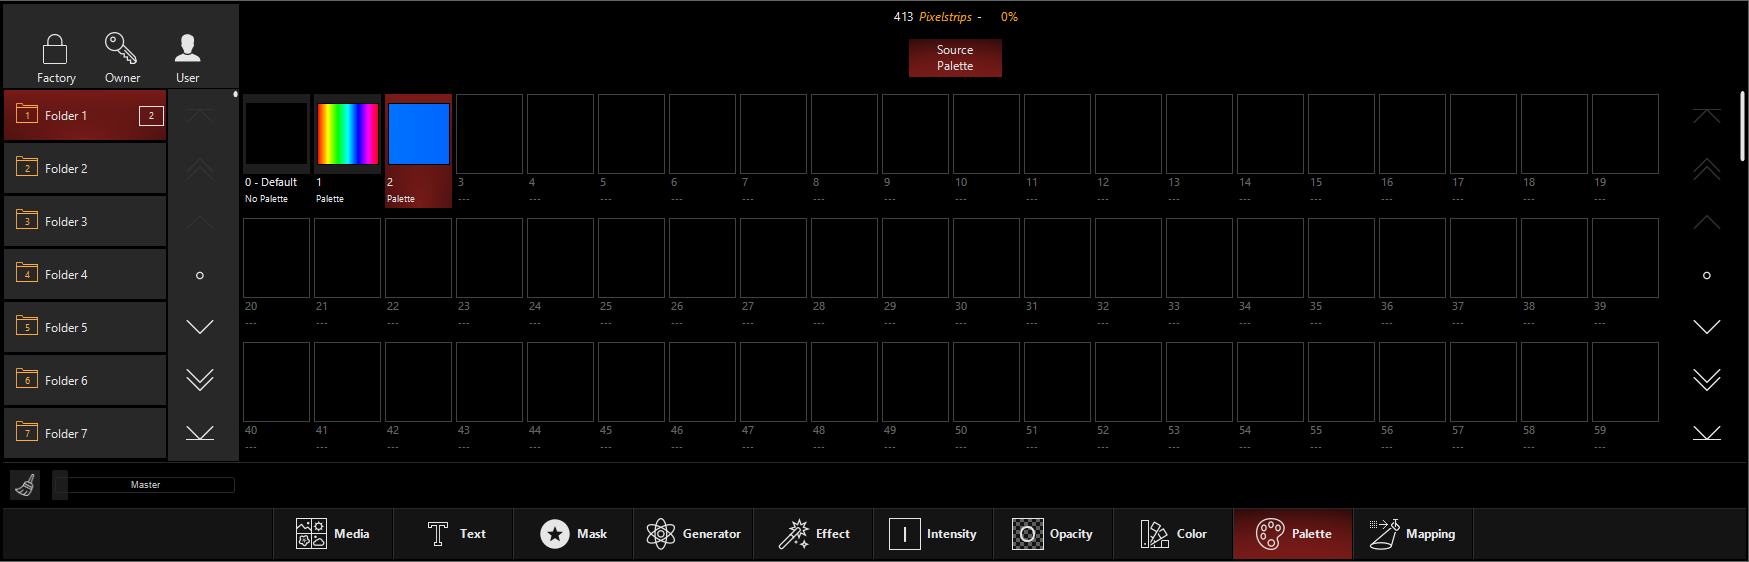
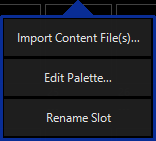
- If you're starting from scratch, all of the palettes will be blank. Right-click or press and press an empty palette slot, and this popup will appear:
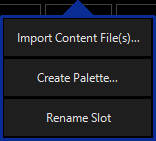
- Here we have a couple of options.
- If you press you will get a file explorer window from which you can choose an image file in a variety of formats. ONYX will then extract the colors from that image file and create a palette based on them.
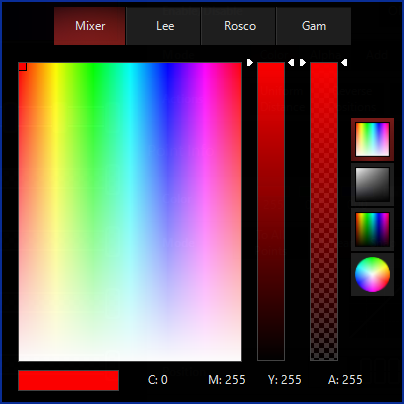
- If you press , the Palette creation window will appear:
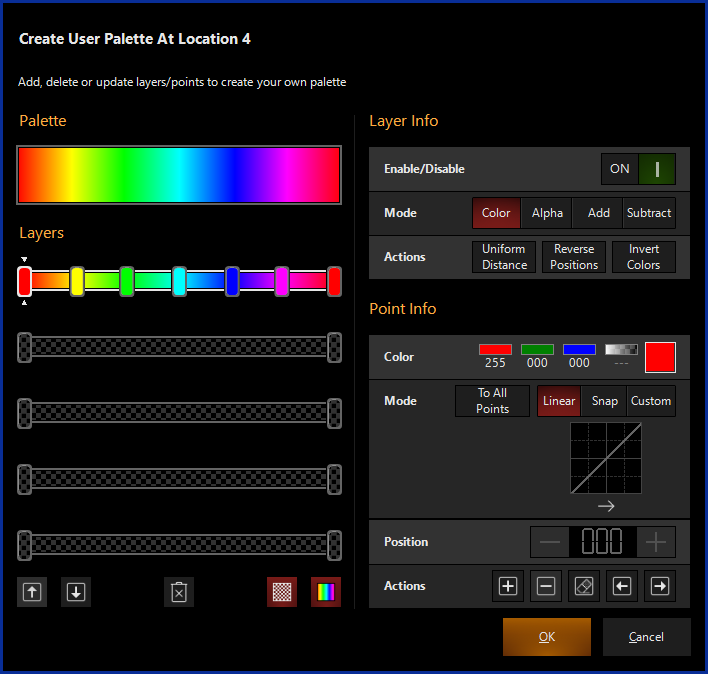
- Use the adjustments in the Palette creation window to create the palette. For more info on the Palette creation window, see the section titled "Using the Palette Creation Window" below. When you're done, press to save the palette, and you're done!
Editing Palettes
- Follow steps 1, and 2 above.
- Right-click or press and press an occupied palette slot, and this popup will appear:
- Press . and the Palette creation window will appear.
- Use the adjustments to edit the palette. When you're done, press to save the palette, and you're done!
Applying Palettes
Palettes may be applied as a parameter on the Source slot of any zone.
When a source is selected, color palettes are available via the tab of the Zone Parameters window. Pressing on a palette applies it to the selected zone, which is displayed at the top of the Zone Parameters window.
Palettes can also be selected via the encoders/Channel Visualization in the parameter group.
Using the Palette Creation Window
The Palette creation window features all the tools to create or edit your palettes:
It has (4) main sections that each allow you to adjust different portions of the palette.
Palette
This section shows you a wide preview of the resulting palette.
Layers
The layers section features (5) customizable layers that feature color and alpha values. Layers are laid out vertically, with the bottom layer being the highest priority.
You can select any point in the layer by pressing on that point, and use the following buttons at the bottom of the layers section:
| Button | Explanation |
|---|---|
 |
Move the selected layer up and down. |
 |
Clear the selected layer (to white) |
 |
Hide alpha information. Note that this hides this information from view, but does not remove them from the palette. |
 |
Hide color information. Note that this hides this information from view, but does not remove them from the palette. |
Layer Info
The layer info section allows you to work with the settings over the selected layer:
| Control | Explanation |
|---|---|
| Enable/Disable | Turns the layer On/Off |
| Mode |
Sets the blending type for the layer:
|
| Actions |
Actions re-position the points within the layer:
|
Point Info
The Point Info section modifies the currently selected point:
| Control | Explanation |
|---|---|
| Color |
Press the color swatch on the right to launch a color picker with RGB and Alpha values:
|
| Mode |
Sets the blending mode between adjacent points.
The custom curve editor features (4) sections:
|
| Position | Placement on the layer by percentage, left to right. |
| Actions |
|
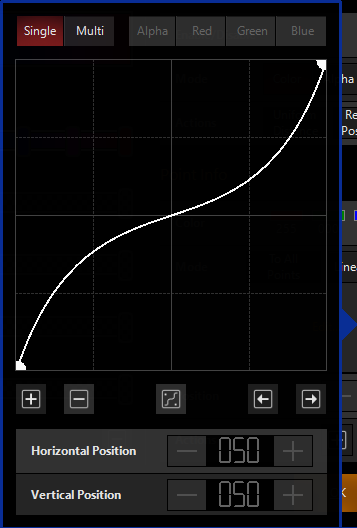
 Add a new point to the curve.
 Remove the selected point from the curve.
 Toggle between line and curve.
 Select the previous point.
 Select the next point.
 Erase color value from selected point (turn to white)
Alpha Channel in the Palette
Palettes don't have to be just colors - Alpha/Opacity information can also be part of palettes:
.png)
The settings above give this result when applied to this Gradient Generator: